Choosing a rubber-jawed clamp for a 240 g phone on 28–35 mm gym bars

How to size and verify a rubber-jawed clamp mount to hold a 240 g phone on 28–35 mm Olympic bars, with recommended ranges, sources for material hardness, and a method to calculate required
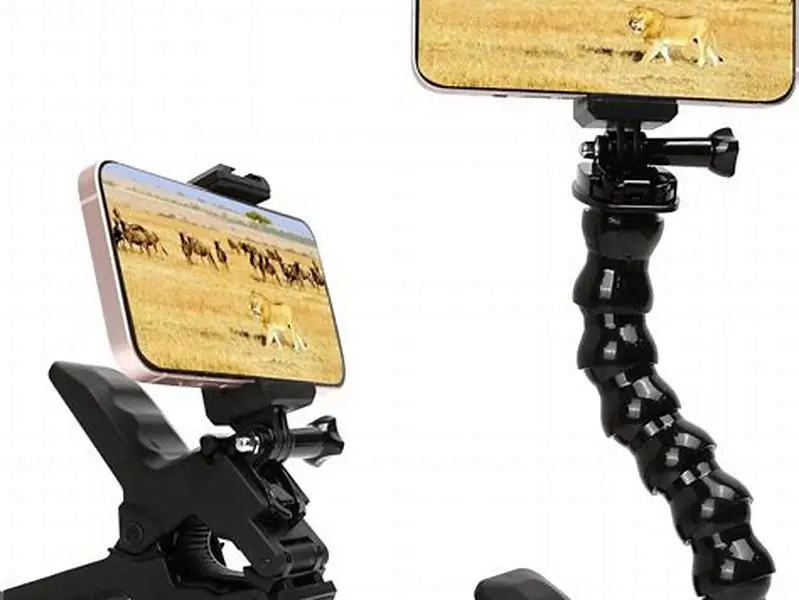
Sizing a rubber-jawed clamp for Olympic bars (28–35 mm diameter) requires matching jaw opening, rubber compliance, and sufficient normal (clamping) force so friction prevents sliding under dynamic workout loads. Typical practitioner guidance is to use medium-hard rubber (around 60–70 Shore A per ASTM D2240) and to design for a normal force that, when combined with a realistic friction coefficient for rubber-on-steel, keeps the phone secure under expected peak accelerations. Below are practical steps, a simple calculation you can use, and example products/standards to check.
On this page (10 sections)
- Key takeaways
- How to size a clamp mount for an Olympic bar (28–35 mm diameter)
- Rubber hardness: what the numbers mean and the source
- How to translate the 240 g phone weight into required clamp force (calculation and examples)
- Practical verification steps (measure and test your chosen clamp)
- Jaw width, texture and jaw shape considerations (dip bars and non-round bars)
- Standards and sources to check
- Example products and product features to look for
- Maintenance and long-term reliability
- Questions people still ask
Part of our guide on non-rotating mount for gym bar
This guide gives a straightforward measurement-and-calculation method plus product features to check so you can choose and verify a rubber-jawed clamp that keeps a 240 g phone secure on Olympic bars under workout conditions.
| Olympic bar diameter | 28–35 mm (measure your bar) |
|---|---|
| Phone weight held | 240 g |
| Typical rubber hardness guidance | ≈60–70 Shore A (see ASTM D2240) |
| Jaw opening guidance | Select to allow 1–3 mm rubber compression on your bar (commonly 30–40 mm nominal openings for 28–35 mm bars) |
Key takeaways
- Measure your bar diameter precisely (28–35 mm is a typical Olympic-bar range) and pick a clamp whose jaw opening and rubber thickness allow 1–3 mm compression on your measured diameter.
- Rubber hardness around 60–70 Shore A (measured per ASTM D2240) is a common, practical compromise between grip and durability for phone clamps — this is an industry recommendation, not a regulation.
- Determine required clamping normal force from friction: required N = (m·g·amax)/μ. Use representative μ values for rubber-on-steel (dry vs. sweaty) and amax that reflects your expected workout dynamics.
- Verify a candidate clamp by measuring or estimating its jaw normal force with a spring scale and running a realistic shake/rep test on your actual bar and phone.
- Look for clamps that state rubber hardness, give a maximum jaw opening, and, ideally, publish clamping force or spring-spec data — examples and standards are listed below.
How to size a clamp mount for an Olympic bar (28–35 mm diameter)
Start by measuring your specific bar diameter with a caliper or accurate ruler. While ‘Olympic bar’ is commonly used to mean bars in the 28–35 mm range, actual bars vary; knowing the exact diameter (e.g., 28.6 mm vs 30 mm vs 32 mm) changes the amount the rubber jaw must compress.
Clamps designed for these bars usually give a nominal jaw opening and list rubber jaw thickness or a closure range. Prefer clamps whose nominal jaw opening exceeds your measured bar diameter by a modest margin so the rubber can compress 1–3 mm and conform to surface texture. This compression provides contact area while maintaining a reliable normal force.
If a clamp lists only a single ‘maximum opening’ value, plan for at least 1 mm of compression at the extremes. For example, a clamp with a 33 mm nominal opening and ~3–4 mm rubber thickness can typically accommodate a 35 mm bar if the rubber compresses into the jaw recess — but always measure and test on your actual bar.
Rubber hardness: what the numbers mean and the source
Rubber hardness is measured on the Shore A scale; ASTM D2240 is the standard test method commonly used to report Shore A values for elastomers. That standard defines how hardness is measured, so when a product lists ‘60 Shore A’ it refers to that test scale (ASTM D2240). Before you commit to anything, it is worth looking at iphone 15 pro mount on spin bike.
Industry and installer communities commonly recommend medium-hard rubber (roughly 60–70 Shore A) for mobile-device clamps because it balances surface conformity (for grip and shock absorption) with wear resistance. This recommendation is a practical industry convention rather than a formal requirement — you should verify the actual product spec (Shore method stated) and test on your bar.
Hardness alone does not guarantee hold; surface texture, rubber compound chemistry (tackiness), jaw width, and actual normal force matter as much or more. Look for product datasheets that list Shore A per ASTM D2240 and describe surface texture (e.g., molded dimples or knurling).
How to translate the 240 g phone weight into required clamp force (calculation and examples)
A phone’s static weight is 0.240 kg·g, but gym movements introduce extra dynamic accelerations (short spikes) that increase the force that tends to make the phone slip. To size clamping normal force you need three things: the phone mass m (0.240 kg), an estimate of the peak acceleration amax during your activity (in multiples of g), and an estimate of the friction coefficient μ between the rubber jaw and the bar surface under realistic conditions (dry vs. sweaty). Before you commit to anything, it is worth looking at 240 g phone magnetic hold test.
A simple friction-balance equation gives the required normal force N (in newtons): N ≥ (m·g·amax)/μ, where g = 9.81 m·s⁻². If you prefer kilogram-force (kgf), divide the right-hand side by 9.81 to get N in kgf.
Representative example values (typical ranges used by installers and product testers): μ for rubber-on-steel can vary widely — roughly 0.4–0.7 for textured/dry rubber, and perhaps 0.15–0.4 when wet or sweaty. Peak accelerations amax during vigorous bar movement or a hard rep can range from 1.5g for mild movement up to 3g or more for abrupt jolts. These are practical assumptions used for sizing; measure your actual conditions when possible.
Example calculation 1 (textured rubber, dry): m = 0.240 kg; amax = 2 g (2×9.81 m/s²); μ = 0.5. Required N = (0.240×9.81×2)/0.5 = 9.43 N ≈ 0.96 kgf. Example calculation 2 (slick/wet surface): m = 0.240 kg; amax = 3 g; μ = 0.25. Required N = (0.240×9.81×3)/0.25 = 28.30 N ≈ 2.89 kgf. There is more on mounts for 30 mm treadmill lip in a separate guide.
Those examples show that under conservative (sweaty/slick) conditions, you may need several times the static-weight-equivalent normal force. Practical installer guidance often aims for normal forces in the single-digit kilograms-force range to provide margin for uncertain friction and higher peaks — that is why practitioners commonly recommend clamps that can supply a few kilograms-force of closure pressure when tested on a spring scale. Note: clamp design and distribution of normal force across the jaw, not just a single point value, affect effectiveness.
Practical verification steps (measure and test your chosen clamp)
Manufacturers rarely publish precise ‘clamping force’ at the jaws in standard units, but you can measure the effective closure force with a spring scale or force gauge. With the clamp attached to the bar and a spring scale placed between the clamp handle and a fixed point per the clamp geometry, record the force needed to open/close to the phone-holding position. Use that measured value as your normal force for the calculation above.
Mount your phone and perform a controlled test: perform several reps that replicate the motion and intensity you expect, and observe for any shift. Include tests with the bar surface intentionally wetted (a damp towel) if you often train sweaty to simulate worst-case friction.
If the clamp shows movement, either increase clamping tension (if safe for the phone), select a clamp with greater jaw contact area or a different rubber compound/texture, or use an auxiliary retention method (safety leash or adhesive pad).
- Measure bar diameter with a caliper.
- Confirm clamp jaw opening and rubber thickness from product specs (look for Shore A and ASTM D2240 mention).
- Measure closure force with a spring scale or force gauge in the clamp’s working position.
- Calculate required N using N ≥ (m·g·amax)/μ with conservative μ and amax.
- Run dynamic tests on your bar (including ‘wet’ test if you sweat a lot).
Jaw width, texture and jaw shape considerations (dip bars and non-round bars)
Jaw width affects pressure distribution. Wider jaws spread the normal force and reduce local deformation; narrower jaws concentrate force and can increase local grip but also increase risk of pressure points on the phone. For typical modern phones, jaw contact areas 50–70 mm across the gripping surface are commonly recommended by product designers to balance contact and safety.
Surface texture on the rubber significantly increases effective friction. Textured molds — dimples, ridges, or cross-hatch patterns — often outperform smooth rubber under sweaty conditions even if Shore A values are similar. Where possible, select jaws with a textured or patterned contact face.
Dip bars and parallel bars that deviate from perfectly round geometry require clamps with pivoting or conforming jaws. Look for adjustable-angle jaws and flexible rubber pads to increase contact area and reduce rotation risk.
Standards and sources to check
ASTM D2240 — Standard Test Method for Rubber Property—Durometer Hardness: use this reference when a product reports Shore A hardness so you know the value follows a recognized measurement method.
Friction coefficient guidance: industry references and engineering resources (e.g., friction tables from Engineering Toolbox and material manufacturer datasheets) give practical μ ranges for rubber-on-steel in dry and wet conditions; use conservative μ for design calculations.
There is no single universally accepted standard that specifies ‘clamp force to hold phones on gym bars,’ so rely on combined use of: product datasheets (Shore A specified per ASTM), measured closure force with a force gauge, and the calculation N ≥ (m·g·amax)/μ for verification.
Example products and product features to look for
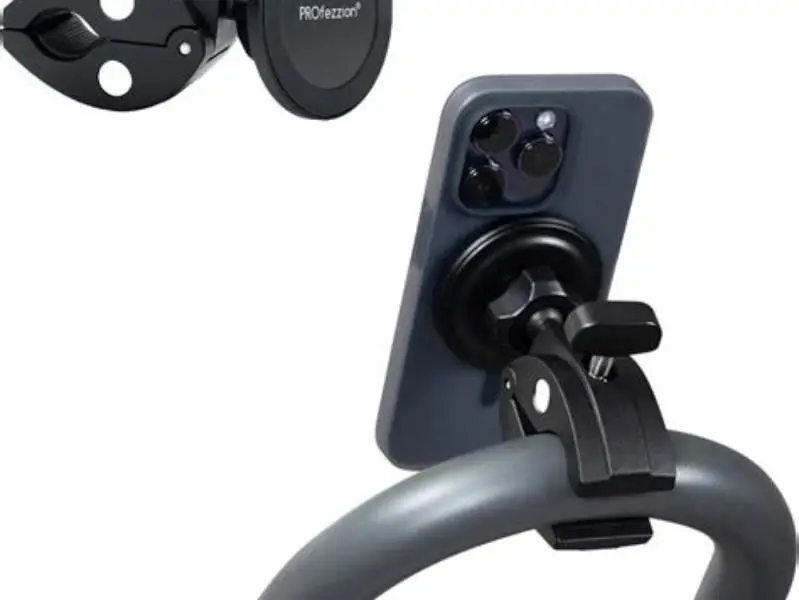
Rather than a single universal product, look for clamps intended for camera or device mounting that list the following: (1) jaw opening range that covers your measured bar (with ~1–3 mm expected compression), (2) rubber Shore A listed (ideally citing ASTM D2240), (3) a textured jaw surface or replaceable rubber pads, and (4) published spring or closure specifications or that include a test method.
Examples of feature sets (manufacturer names withheld here so you can search current models): device mounts marketed for ‘bar mounts’ or ‘exercise camera mounts’ often include rubber pads noted as 60–70 Shore A and state compatibility with 28–35 mm bars. Many aftermarket action-camera clamps (look at product datasheets on retail and manufacturer pages) provide jaw dimensions, pad materials, and sometimes measured closure spring force; these are good starting points.
When you find a candidate, confirm the datasheet values and then perform the practical verification described above. If the seller does not list Shore hardness and jaw force, treat the listing as incomplete for safety-critical use and either ask the vendor for measured data or test the clamp yourself.
Maintenance and long-term reliability
Rubber degrades with time, sweat, UV, and mechanical wear; periodic inspection (every 3–6 months with regular use) is prudent. Cracks, glazing, or hardening are signs the contact pad should be replaced.
If your clamp has replaceable pads, keep spare pads and replace them if grip decreases. Re-check the closure force after pad replacement.
Questions people still ask
Can a clamp with harder rubber jaws damage my phone?
Very hard jaws (high Shore A) concentrate force and can create pressure points if over-tightened. Use appropriate jaw width and avoid excessive tightening; aim for a balance between grip and even pressure distribution. Confirm via testing.
What if my Olympic bar is outside the 28–35 mm range?
Measure the diameter and select a clamp whose jaw opening plus expected rubber compression matches that diameter; for unusual sizes you may need specialized or adjustable clamps.
Does sweat affect clamp grip?
Yes. Sweat lowers the effective friction coefficient μ and therefore raises the required normal force. Use textured rubber pads and conservative design margins; test with wet-bar simulations if you sweat heavily.
Are magnetic mounts reliable on Olympic bars?
Magnets are generally inadequate for dynamic workouts because they rely on adhesion rather than clamped normal force. Mechanical clamps with rubber jaws provide more reliable grip for a 240 g phone during movement.
How do I prevent clamp rotation on dip bars?
Use clamps with pivoting or conforming jaws, wider contact pads, and a locking mechanism that resists rotation. Test on the specific bar geometry.