How to Replace Engine Mounts Safely on Your Vehicle

Support the engine from below with a hydraulic jack and wood block, unbolt the old mount from the frame and engine bracket, fit the new mount, torque to spec, and check alignment. The engine must stay supported until all mounts are tight.
On this page (8 sections)
Part of our guide on car mount holding phone in thick case
Fast facts
- Typical mount count
- 3 to 5 depending on engine layout
- Torque spec range
- 30-80 ft-lb, varies by mount location
- Time required
- 2-4 hours for inline engines
- Jack lift height
- Just enough to unload the mount
- Replacement interval
- 60,000-100,000 miles typical
- Labor cost if pro
- $200-$600 depending on access
Remember this
- Support the engine with a jack and wood block before removing any mount bolt
- Replace mounts one at a time to keep the engine from shifting out of position
- Torque mount bolts to spec: over-tightening tears the rubber within a few thousand miles
- Check for binding by rocking the engine after installation; it should move slightly in all directions
- Expect 2-4 hours for a four-cylinder with three mounts, longer for V6 or V8 with four or five
When and why you need to replace engine mounts
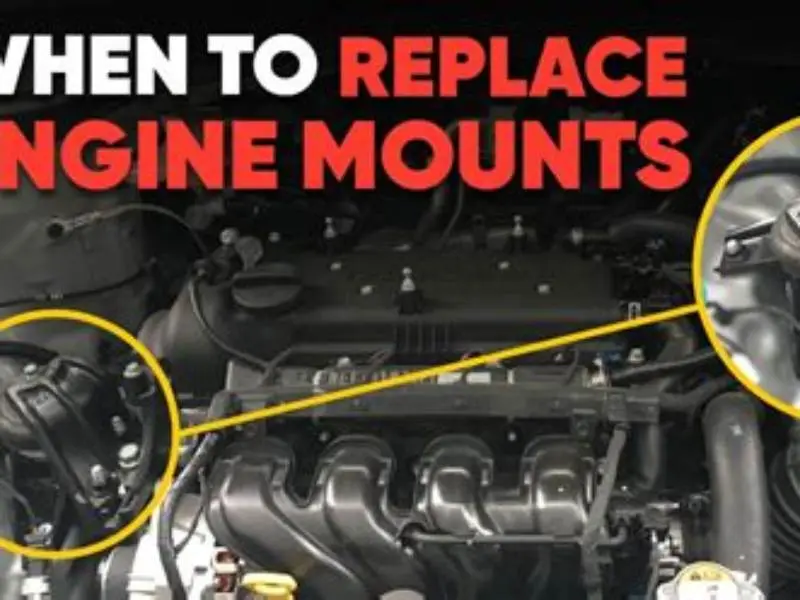
Engine mounts fail when the rubber isolator cracks, separates from the metal bracket, or collapses from age and heat. You'll feel it as excessive vibration at idle, a clunk when you shift from park to drive, or visible engine movement when you rev the throttle in neutral. Most mounts last 60,000 to 100,000 miles, but harsh driving, oil leaks dripping onto the rubber, and heat from turbochargers or exhaust components shorten that.
A collapsed mount lets the engine sag and shift under load. That movement stresses the remaining mounts, tears CV axles on front-wheel-drive cars, and can crack exhaust pipes or bend throttle linkages. The engine may rock enough to hit the frame or the hood. If one mount has failed, the others are close behind: they all experienced the same heat and mileage.
You can check mounts yourself by having someone rev the engine in neutral while you watch from the side with the hood open. The engine should lift slightly and settle back. If it rocks more than an inch or tilts visibly to one side, a mount has collapsed. Press on the mount with a pry bar; torn rubber or fluid leaking from a hydraulic mount means replacement. Don't wait: each failed mount doubles the load on the rest.
Tools and parts you need before you start
You need a hydraulic floor jack rated for your vehicle's weight: 2-ton minimum for sedans, 3-ton for SUVs and trucks. A bottle jack or the factory scissor jack won't work; you can't control the lift finely enough and the engine will shift during the swap. Get a wood block at least 8 inches square and 2 inches thick to spread the load across the oil pan. A piece of 2x10 works. The pan will dent if you lift on bare metal. We go through safe extension lengths for dash arm mounts step by step elsewhere on the site.
Get a socket set with metric and standard sockets, extensions, and a breaker bar. Most mount bolts run 14mm to 19mm. A torque wrench is not optional: mount bolts have a narrow spec range, usually 30 to 80 ft-lb depending on the mount location, and over-tightening crushes the rubber isolator. You'll also need jack stands to support the car if you're working under it, though most mount work happens from above or the side.
Buy mounts from the vehicle manufacturer or a known aftermarket brand like Anchor, Westar, or DEA. Cheap no-name mounts use softer rubber that collapses in a year. Hydraulic mounts, common on inline-4 and V6 engines, have a fluid chamber inside the rubber; these cost $60 to $150 each versus $30 to $70 for solid mounts. Count the mounts on your engine before ordering: inline-4 engines typically have three, V6 and V8 engines have four or five.
Check your service manual for torque specs and the order of installation. Some engines require you to tighten the frame-side bolts before the engine-side bolts, or vice versa, to avoid binding the mount. If you don't have a manual, search for a forum post or video specific to your engine and chassis. Generic advice gets you into trouble when a transverse mount is buried under the intake manifold or a rear mount doubles as a transmission mount. If that sounds like your situation, read up on simple home repair tips next.
- Hydraulic floor jack: 2-ton for sedans, 3-ton for trucks
- Wood block: 8x8 inches minimum, 2 inches thick
- Metric socket set: 10mm to 19mm with extensions
- Torque wrench: click-type, 20-100 ft-lb range
- Jack stands: rated for vehicle weight if working underneath
- Breaker bar: 18-inch for stubborn bolts

Maxority 3-Ton (6600lbs) Low Profile Hydraulic Heavy-Duty Steel Floor Jack
Supports vehicles up to 3 tons (6600 lbs), suitable for lifting SUVs and trucks safely.
Supporting the engine during removal
The engine must be supported from below before you remove a single mount bolt. Place the hydraulic jack under the oil pan with the wood block between the jack saddle and the pan. Raise the jack until it just touches the block: you're not lifting the car, you're unloading the mount so the rubber isn't compressed. The weight should shift from the mount to the jack. You'll see the mount relax slightly.
If you're replacing a top mount like the one on the passenger side of most inline-4 engines, you might need to lift the engine a quarter-inch to take tension off the mount bolts. If you're doing a lower mount, like the one on the subframe under the engine, you might need to lower the jack a hair so the mount isn't stretched. The goal is to have the bolt holes line up with zero force: if you're fighting the socket to turn the bolt, the mount is still loaded.
Some transverse engines have a torque mount on the firewall side that stops the engine from rocking forward under acceleration. These are tricky because they're under tension even when the engine is supported from below. You may need a pry bar to push the engine forward slightly so the bolts come free. Don't skip the support step and try to just unbolt everything: most engines weigh 300 to 500 pounds and will drop onto the subframe or CV axles the moment you pull the second mount. It helps to understand how to check motorcycle forks before going further.
If you're replacing multiple mounts, do them one at a time. Remove the old mount, fit the new one, snug the bolts hand-tight, and move to the next. If you pull all the mounts at once, the engine shifts and the bolt holes won't line up when you try to install the new ones. You'll end up levering the engine around with a pry bar and marring the paint or cracking a bracket.
Most DIY mount replacements fail because the engine shifts during installation, binding the new mount before you even start the car.
How to physically replace engine mounts step by step
Start with the easiest mount first: usually the top passenger-side mount on inline-4 engines or the front mount on V6 engines. This one is visible from above and has only two or three bolts. Raise the jack to unload the mount, then remove the bolts that attach the mount to the frame bracket. These are usually 15mm or 17mm and may have a nut on the back side that you'll need a wrench to hold while you turn the bolt.
Once the frame-side bolts are out, remove the bolts that attach the mount to the engine bracket. Some mounts have a through-bolt that passes through the entire mount; others have studs on the engine side with nuts on top. The through-bolt will be tight: use a breaker bar if it won't budge with a ratchet. Pull the old mount out. It may be stuck to the bracket with corrosion; tap it with a rubber mallet if needed. Before you commit to anything, it is worth looking at measuring for tv arm extension.
Fit the new mount into the frame bracket first, then raise or lower the jack to align the engine-side holes. Thread the bolts in by hand to make sure they're not cross-threaded. Snug them down with a ratchet but don't torque them yet. Move to the next mount and repeat the process. When all the new mounts are in place, go back and torque each bolt to spec. The service manual will list different specs for frame-side and engine-side bolts: frame bolts are typically 50-70 ft-lb, engine bolts 30-50 ft-lb.
Lower the jack slowly and check that the engine settles evenly. It should sit level with no visible sag to one side. Rock the engine by hand: it should move slightly in all directions and return to center. If it binds or feels stiff, a mount is misaligned or over-torqued. Loosen the bolts on that mount, let the engine settle, and re-torque. A bound mount will tear itself apart in a few thousand miles.
- Raise the jack to unload the mount and remove the frame-side bolts first
- Remove the engine-side bolts and pull the old mount free
- Fit the new mount into the frame bracket and align the engine-side holes
- Thread all bolts by hand, then snug with a ratchet but don't torque yet
- Move to the next mount and repeat until all mounts are replaced
- Torque all bolts to spec in the order listed in the service manual
- Lower the jack and check for binding by rocking the engine by hand
Torque specs and why they matter for mount longevity
Mount bolts have a narrow torque range because the rubber isolator inside the mount is compressed when you tighten the bolts. Over-tighten and the rubber is crushed, which hardens it and kills the vibration damping. The mount will transmit engine shake straight to the frame and fail in 10,000 to 20,000 miles instead of 80,000. Under-tighten and the bolt works loose, letting the engine rock excessively and tearing the mount bracket off the engine.
Most frame-side bolts call for 50 to 70 ft-lb, while engine-side bolts run 30 to 50 ft-lb. Through-bolts that pass through the mount itself are usually in the middle, around 45 to 60 ft-lb. Your service manual will list the exact spec for each bolt. If you don't have a manual, call the parts counter at a dealer and ask: they can look it up in seconds. Don't guess; a 10 ft-lb error is enough to matter.
Use a click-type torque wrench, not a beam or digital wrench, for mount work. Click wrenches are more accurate at the low end of their range, and mount bolts are in the sweet spot. Set the wrench to the spec, tighten until it clicks, and stop. Don't bounce the wrench or keep pulling after the click: that adds another 5 to 10 ft-lb. If a bolt is rusted or corroded, clean the threads with a wire brush before torquing. Friction from rust makes the wrench read higher than the actual bolt tension.
Some engines require you to torque the mounts with the engine running at idle. This pre-loads the mount in its operating position and prevents binding. The manual will specify this if it applies. If you torque the mounts with the engine off and then start the car, the engine may lift slightly and bind the mount. You'll hear a clunk when you shift into gear and the mount will fail prematurely.
| Mount location | Frame-side bolts | Engine-side bolts | Notes |
|---|---|---|---|
| Top passenger-side | 50-65 ft-lb | 35-45 ft-lb | Tighten frame side first |
| Lower front or rear | 60-75 ft-lb | 40-50 ft-lb | Through-bolt may replace engine-side |
| Torque mount (firewall) | 55-70 ft-lb | 30-40 ft-lb | Often requires engine to be running |
| Transmission mount | 50-60 ft-lb | 30-45 ft-lb | Check transmission service manual |
Common problems during replacement and how to avoid them
The most common mistake is pulling multiple mounts at once. The engine shifts and the bolt holes no longer line up with the new mounts. You'll spend an hour levering the engine with a pry bar, scratching paint, and bending brackets. Replace mounts one at a time and you avoid this entirely. The second most common error is forgetting to support the engine before loosening the bolts. The engine drops onto the subframe, pinches a coolant hose, or bends a CV axle.
Cheap mounts fail fast. No-name mounts from discount auto parts stores use rubber that's too soft or too hard. Soft rubber compresses under load and the engine sags within months. Hard rubber transmits vibration like the mount isn't there. Stick with OEM or known brands like Anchor, Westar, or DEA. Hydraulic mounts must be filled with fluid at the factory: aftermarket versions sometimes arrive half-full or with air bubbles, and they clunk from day one.
Seized bolts are inevitable on older vehicles. Spray them with penetrating oil the night before and again in the morning. If a bolt still won't turn, heat it with a propane torch for 15 to 20 seconds and try again. Don't use an impact wrench on mount bolts: you'll snap the stud off inside the bracket and then you're drilling it out or replacing the entire bracket. If a nut spins on a stud, hold it with a box wrench while you turn the bolt.
Misaligned mounts bind the engine and tear within weeks. After you lower the jack, grab the engine and rock it forward, back, and side to side. It should move a quarter-inch in each direction and return to center. If it's stiff or you hear a creak, a mount is misaligned or over-torqued. Loosen that mount, let the engine settle naturally, and re-torque. Some transverse engines sit at an angle and the mounts look crooked when they're correct: trust the service manual and the torque wrench, not your eye.
- Seized bolts: soak with penetrating oil overnight, heat if needed, no impact wrench
- Misalignment: engine should rock a quarter-inch in all directions after install
- Cheap mounts: soft rubber compresses, hard rubber transmits vibration, stick with OEM or known brands
- Cross-threaded bolts: always start bolts by hand before using a wrench
- Dropped engine: support with jack and wood block before removing any mount bolt
FAQ
Can I drive with one bad engine mount while I wait for the part to arrive?
You can drive short distances at low speed, but avoid it if possible. A collapsed mount doubles the load on the remaining mounts and they'll fail faster. The engine will rock excessively under acceleration and can hit the frame, crack an exhaust pipe, or tear a CV axle. If you must drive, keep it under 40 mph and avoid hard throttle.
Do I need to disconnect the battery before replacing engine mounts?
Not usually, unless a mount is directly under a wiring harness or you're removing the intake manifold to reach a hidden mount. The battery should be disconnected if you're working near the starter, alternator, or any high-current wiring. Check your service manual: some vehicles require a battery disconnect to clear fault codes after the job.
How do I know which mount failed if more than one is worn?
Have someone rev the engine in neutral while you watch from the side with the hood open. The engine will sag or tilt toward the failed mount. You can also press on each mount with a pry bar: a good mount resists with firm rubber, a bad one squishes, has visible cracks, or leaks fluid. If you're not sure, replace all of them. They age together and one failure means the others are close.
Can I use polyurethane mounts instead of rubber for longer life?
Polyurethane mounts last longer but transmit more vibration into the cabin. They're common on race cars and heavily modified engines where longevity and precise engine control matter more than comfort. For a daily driver, stick with rubber or hydraulic mounts. The vibration from poly mounts will rattle trim panels and make the car feel harsh at idle.
What happens if I torque the mounts while the engine is hanging from the jack?
The mounts will bind when you lower the jack and the engine settles into its natural position. A bound mount is pre-loaded and will tear in a few thousand miles. Always lower the jack after snugging the bolts by hand, let the engine settle, then torque to spec. Some manuals specify torquing with the engine running at idle to pre-load the mounts in their operating position.
How much does it cost to have a shop replace engine mounts?
Labor runs $200 to $600 depending on how many mounts you're replacing and how buried they are. Inline-4 engines with top-side access take 2 hours. V6 engines with a mount under the intake manifold or behind the AC compressor take 4 to 6 hours. Parts cost $150 to $400 for all mounts. Total bill is usually $350 to $1,000. Get quotes from two shops: access varies wildly by chassis and some shops charge by the book time, which is often padded.