How to sew a simple fabric pouch bag step by step

Cut two fabric pieces sized to your needs, stitch with a durable seam like backstitch or machine stitch, finish edges with bias tape or zigzag stitching, and add a closure like a zipper or snap. This method creates a sturdy, neat pouch bag.
On this page (8 sections)
Part of our guide on scratch-free magnetic gym pouch
Fast facts
- Seam allowance
- 1/2 inch
- Recommended stitch
- Backstitch or machine
- Edge finish
- Bias tape or zigzag
- Closure types
- Zipper or snap
- Typical pouch size
- 7x9 inches
Remember this
- Cut fabric pieces larger than final size to allow seam allowance.
- Use backstitch or machine stitch for strong seams.
- Finish edges to prevent fraying and extend pouch life.
- Choose closures that fit your pouch size and use.
- Adjust pouch size based on items like phone and keys.
How to cut fabric pieces for a pouch bag
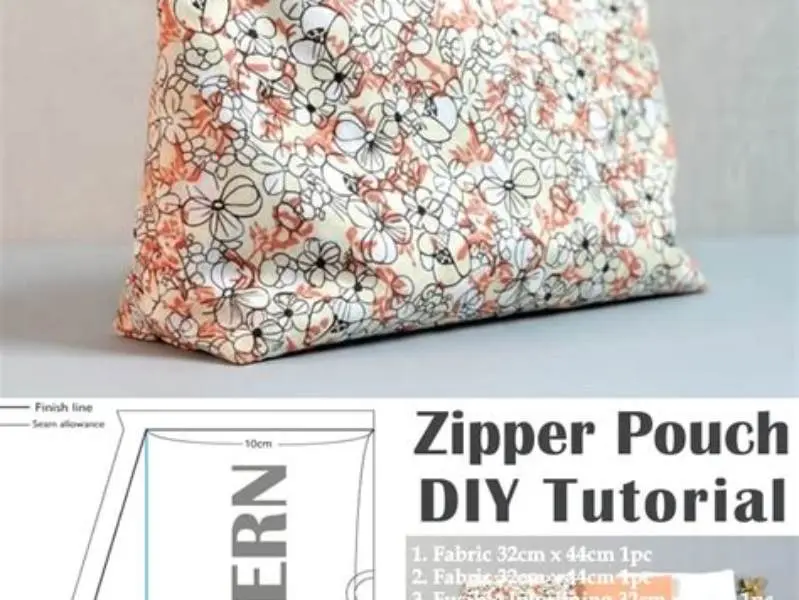
Cutting your fabric pieces precisely affects how well your pouch bag will fit your essentials. We usually add a seam allowance of 1/2 inch around the desired final pouch size.
For a pouch meant to hold a phone, keys, bottle, and card, a typical size is around 7 by 9 inches finished. That means cutting two pieces approximately 8 by 10 inches.
Use a ruler and fabric chalk or pencil to mark your fabric before cutting. Cotton or canvas are common pouch materials because they hold shape and sew easily.
If you want internal pockets or a lining, cut those pieces slightly smaller to fit inside the main pieces without bulk. We go through plastic pouch recycling steps step by step elsewhere on the site.
If your pouch design includes a gusset for extra depth, cut an additional strip of fabric. A typical gusset width ranges from 1 to 2 inches, depending on how roomy you want the pouch. For example, a 1.5-inch wide gusset cut to the perimeter length of the pouch adds useful volume without bulk.
Cutting fabric on the grain is crucial for shape retention. Ensure your fabric pieces align with the grainline by referencing the woven threads. This prevents stretching or warping during use. Cotton and canvas hold shape well when cut on grain, providing a professional finish.
Which stitches to use for durability
Durability means choosing strong stitches. We prefer a backstitch for hand sewing or a straight stitch using a sewing machine with a stitch length of about 2.5 mm for best strength. It helps to understand gym bag packing tips before going further.
Avoid running stitch alone: it’s quick but not strong enough for seams under stress. Backstitch overlaps each stitch, giving good hold.
If your machine has a zigzag stitch option, use it only for reinforcing edges, not the main seam.
Double stitching the pouch opening or areas that will bear weight is a good idea to prevent wear. There is more on buying metal phone plates for bike bags in a separate guide.
For even stronger seams, consider a double backstitch at the start and end of each seam. This locks stitches in place and prevents unraveling. For machine sewing, backstitch over about 1/4 inch at seams’ start and finish.
When hand sewing, use a strong polyester or nylon thread rather than cotton to resist wear. Thicker threads also add durability. Test a few stitches on scrap fabric to check tension and durability before starting your pouch.
If your pouch will carry heavy or abrasive items, reinforce corners with bar tacks. These are short, dense stitches that prevent corner stress damage. Bar tacks take just seconds to sew but add longevity. The other half of this decision is when to replace them early.

1 Inch Double Fold Bias Tape
Provides 1 inch wide polyester bias tape pre-folded for easy edge finishing and durability.
How to finish edges and add closures
Fraying will ruin your pouch fast if edges aren’t finished. We usually apply bias tape to enclose raw edges or use a zigzag machine stitch to stop fray.
Bias tape adds a neat, durable finish but requires some skill to apply evenly, especially on curved edges.
Closures can be a zipper, snaps, or buttons depending on style and use. Zippers add the most security and are easiest for quick access.
When sewing a zipper, place it between the two fabric pieces before stitching the sides and bottom, so the pouch closes securely.
If you’re new to bias tape, pre-press it before sewing. This means folding and ironing it along the crease lines. Pre-pressing helps it apply smoothly, especially around curves where fabric can pucker.
For zipper installation, consider using a zipper foot on your machine. This foot lets you stitch very close to zipper teeth for a clean finish. A 7-inch zipper is common for a pouch about 7 by 9 inches, giving full closure without excess length.
Snaps install with a simple press tool or pliers. Space them evenly to avoid gaps. Test snap positioning by closing the pouch before sewing in place to ensure ease of use.
A simple stepwise process for sewing a fabric pouch bag tailored for carrying phones and keys hands-free.
Tips for sewing pouches inside crochet bags
Crochet bags often have large holes, so adding a fabric pouch inside keeps small items safe and organized.
We cut the fabric pouch slightly smaller than the crochet bag interior to fit comfortably without stretching the yarn.
Attach the pouch inside by sewing through the fabric and a few crochet stitches in strategic spots to hold it securely but avoid tension.
Choose a fabric with some stretch or softness to prevent snagging the crochet yarn.
How to sew a pouch bag step by step
Sew a pouch bag by first cutting two fabric pieces with 1/2 inch seam allowance around your desired final size.
Place fabric pieces right sides together. Pin along edges, leaving the top open if adding a zipper later.
Sew along three sides using backstitch or machine straight stitch, reinforcing corners with extra stitches.
If using a zipper, install it along the open edge before sewing final seams.
Turn the pouch right side out. Press seams flat using an iron for a neat finish.
Add any additional closure like snap buttons or decorative elements.
Optional: topstitch around edges for extra strength and a finished look.
- Cut two fabric pieces with seam allowance.
- Pin pieces right sides together, leaving top open if zipper.
- Sew three sides with strong stitch.
- Install zipper if using.
- Turn right side out and press.
- Add closures and topstitch.
| Pouch Area | Recommended Stitch | Reason |
|---|---|---|
| Main seams | Backstitch or machine straight | Strong hold under stress |
| Edges | Bias tape or zigzag | Prevents fraying |
| Closure area | Double stitched straight | Extra durability |
| Topstitching | Straight stitch | Neat finish and strength |
How to sew a pouch bag
To sew a pouch bag, start by selecting fabric thickness and size suited for your phone and essentials. Cut two pieces with 1/2 inch seam allowance.
Pin the pieces right sides together and stitch along three edges securely using a backstitch or sewing machine.
Add edge finishes like bias tape or zigzag stitch to stop fraying before turning the pouch right side out.
Add a zipper or snap closure to keep your items secure during workouts or travel.
Adjust pouch dimensions to fit your specific phone model and case size, allowing some internal room for keys and cards.
FAQ
How much seam allowance should I leave when cutting fabric?
A standard seam allowance of 1/2 inch is recommended. It provides enough fabric to sew strong seams without altering final pouch size.
What stitch is best for making a durable pouch?
Backstitch for hand sewing or a straight stitch with a machine at about 2.5 mm stitch length offers strong, lasting seams.
Can I use fabric glue instead of sewing?
Fabric glue is less durable than stitches and not recommended for pouch seams, especially if carrying heavier items like phones or bottles.
Is it necessary to finish the edges?
Yes. Finishing edges with bias tape or zigzag stitch prevents fraying, extending your pouch's life and keeping it looking neat.
What closure should I use?
Zippers provide the best security and easy access. Snaps or buttons work but may be less secure and slower to open.